How Generate Self-Signed Certificates on a PAN-OS Firewall
So you don't have a Windows Server with Active Directory and Certificate Services ready to go, but wait you need to test GlobalProtect client certificate authentication now! What's the answer? Easy, generate a self-signed root certificate on the Palo Alto Networks firewall and create a client cert and sign it with firewalls Certificate Authority (CA)...simples! Let me walk you through this config.
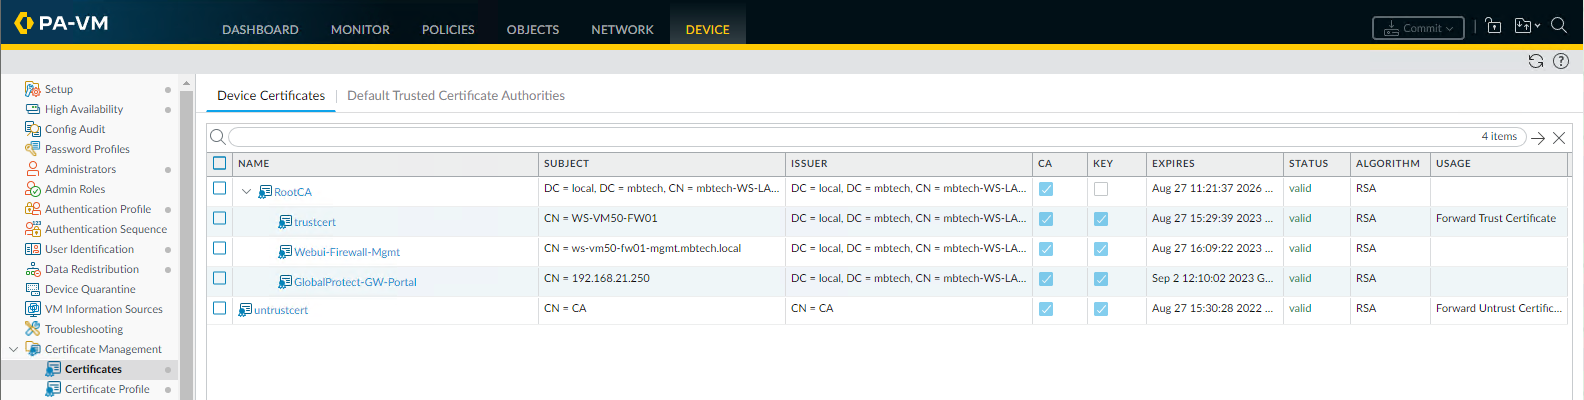
Log into your PAN-OS firewall and head to the device tab and click on Certificates. All the certificates currently on my lab firewall have been either generated or signed by my lab Windows 2016 Certificate Authority, so you can ignore these!
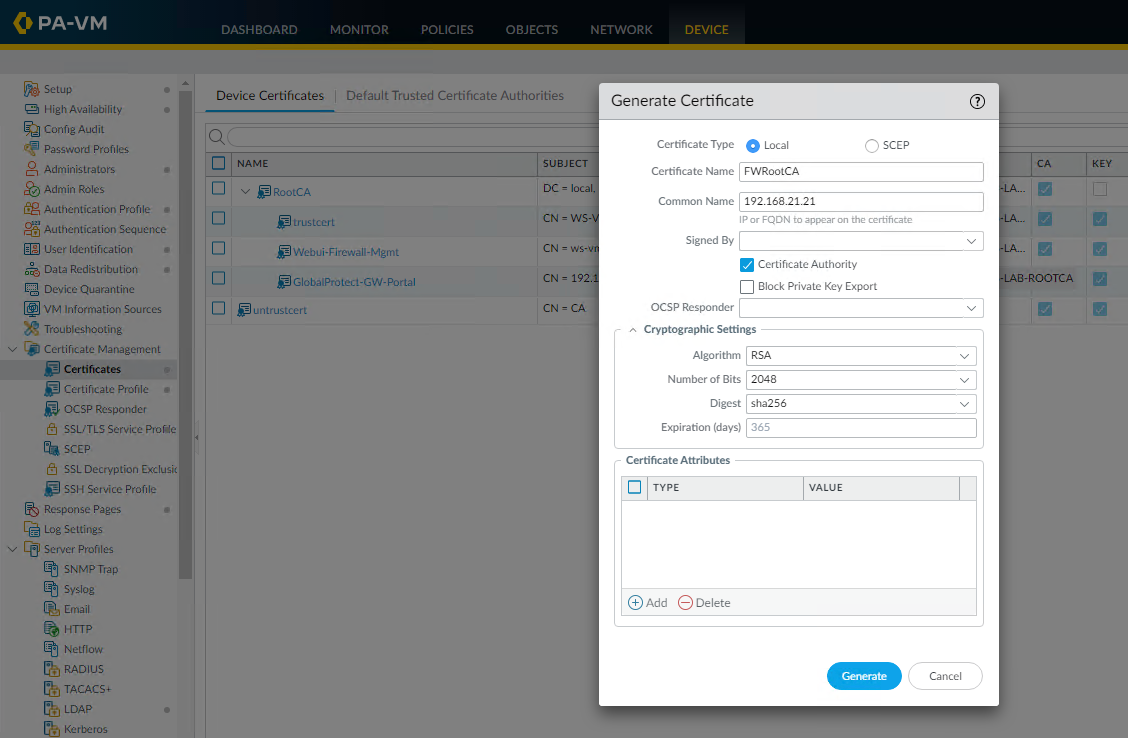
Click "Generate" and give the certificate a name of your choice and in the "Common Name" field either enter the FQDN of the firewall or the IP address. Tick the "Certificate Authority" box and hit the "Generate button"
Notice that the new "FWRootCA" isn't nested under the "RooCA" certificate as it's not issued or signed by my lab Windows Server Certificate Authority.

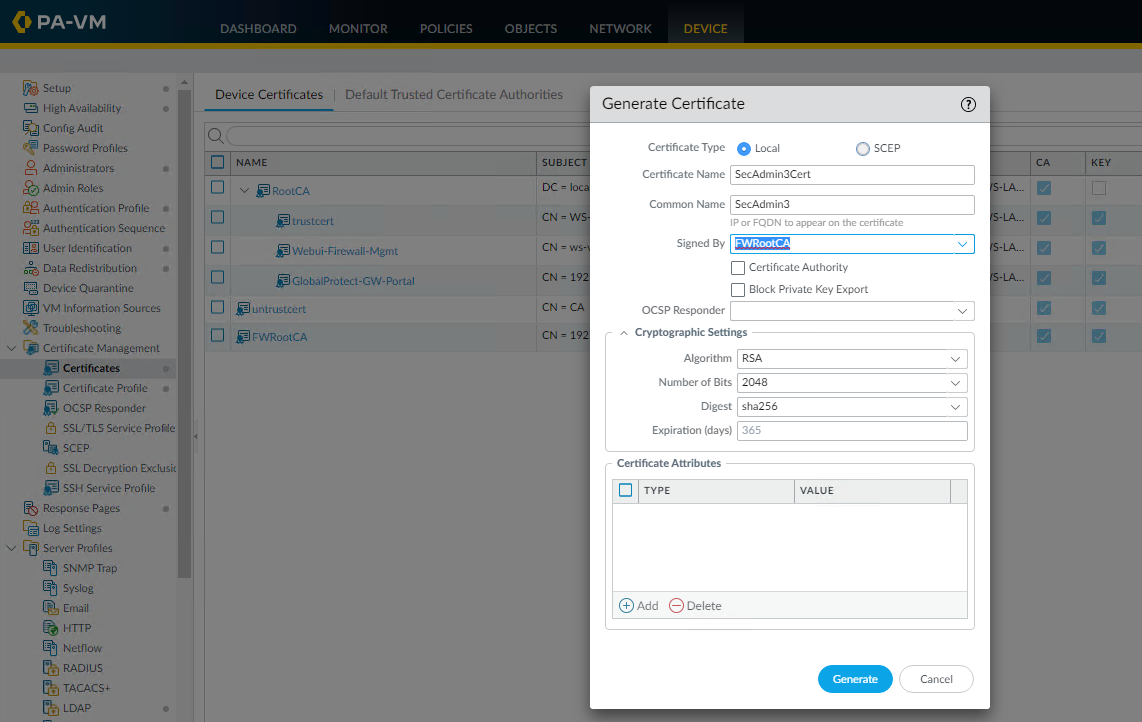
The next step is to generate a client certificate that will be signed by the newly generated "FWRootCA". So click the "Generate" button again, name the certificate with any name, something meaningful and in the "Common Name" put the actual username of the person that will be signing into the client device. And finally in the "Signed By" drop-down choose the firewalls self-signed Root CA and hit "Generate".
Once the client certificate has been generated for your user, it should be nicely nested under the Firewalls Self-Signed Root CA like mine below, we now have a certificate chain of trust!

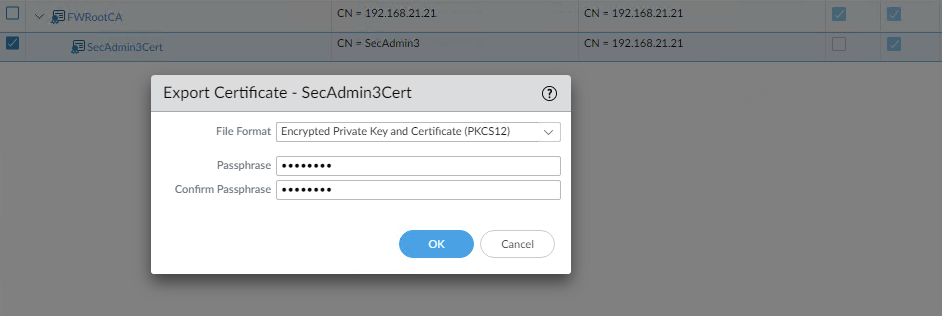
The next task is to export the client certificate from the firewall into the user's personal certificate store. So go ahead and tick the client certificate and click "Export" Choose the PKCS512 file format and enter a passphrase you can remember and click ok. You may need to get a bit creative on how you get the certificate onto your client machine, google drive works for me.
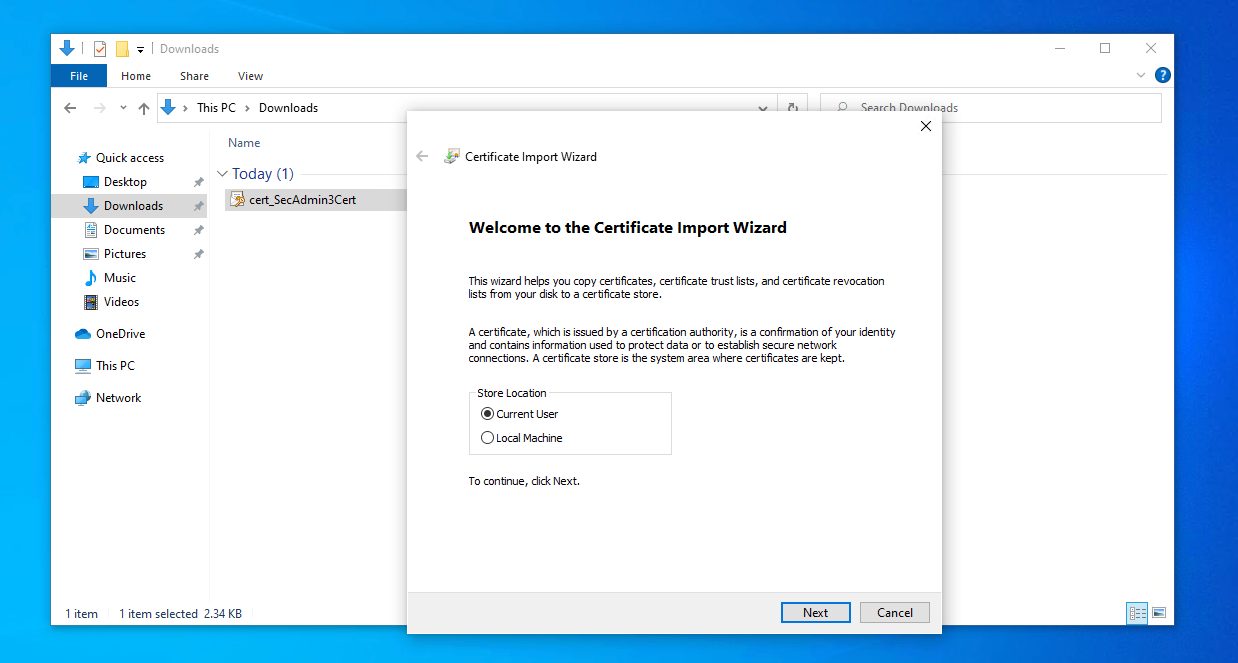
Once you get the certificate onto the endpoint, just double-click the cert and make sure "Current User" is selected , click "Next"
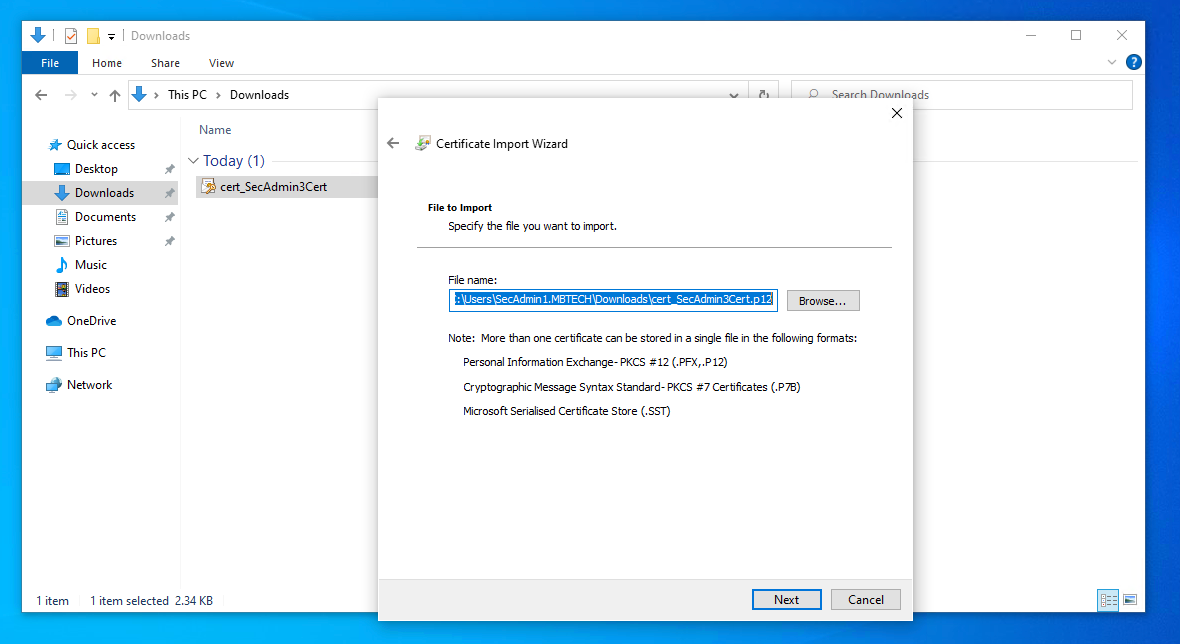
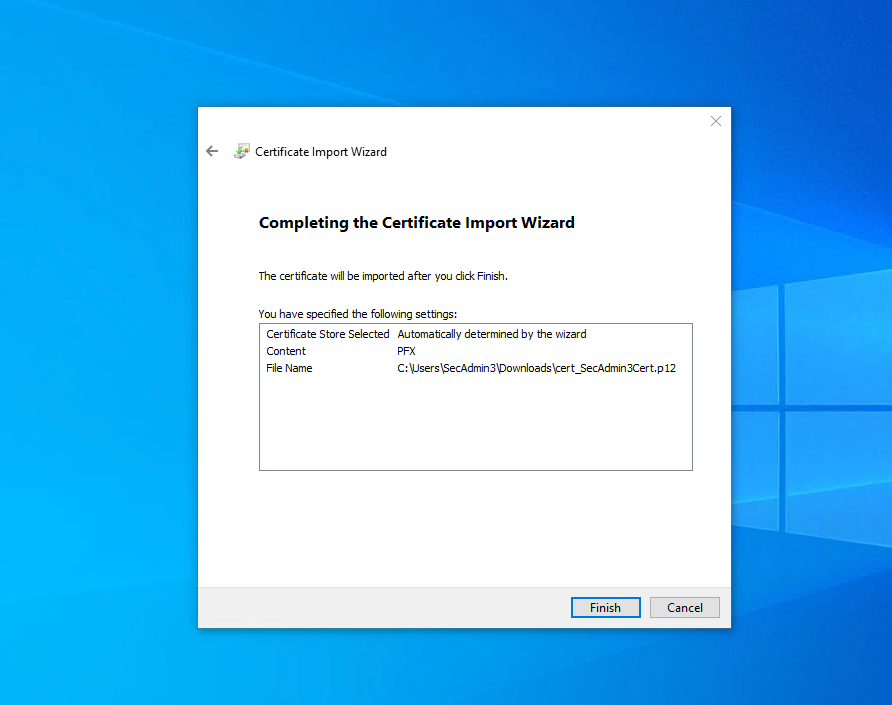
Confirm the file name and Click "Next"
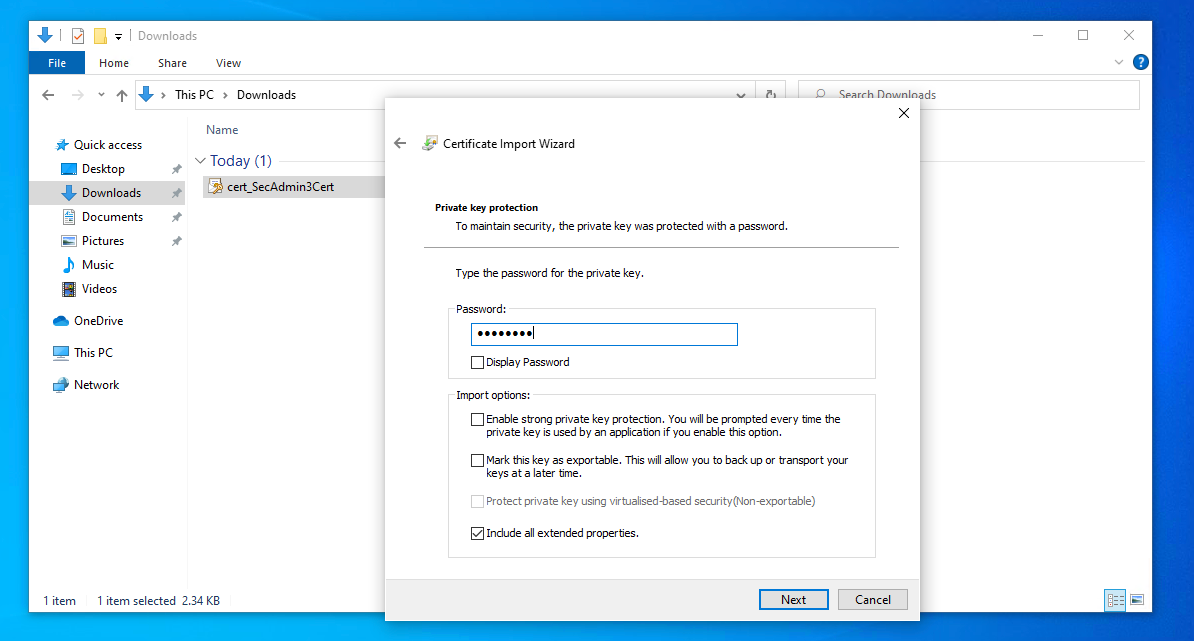
Type in your passphrase.
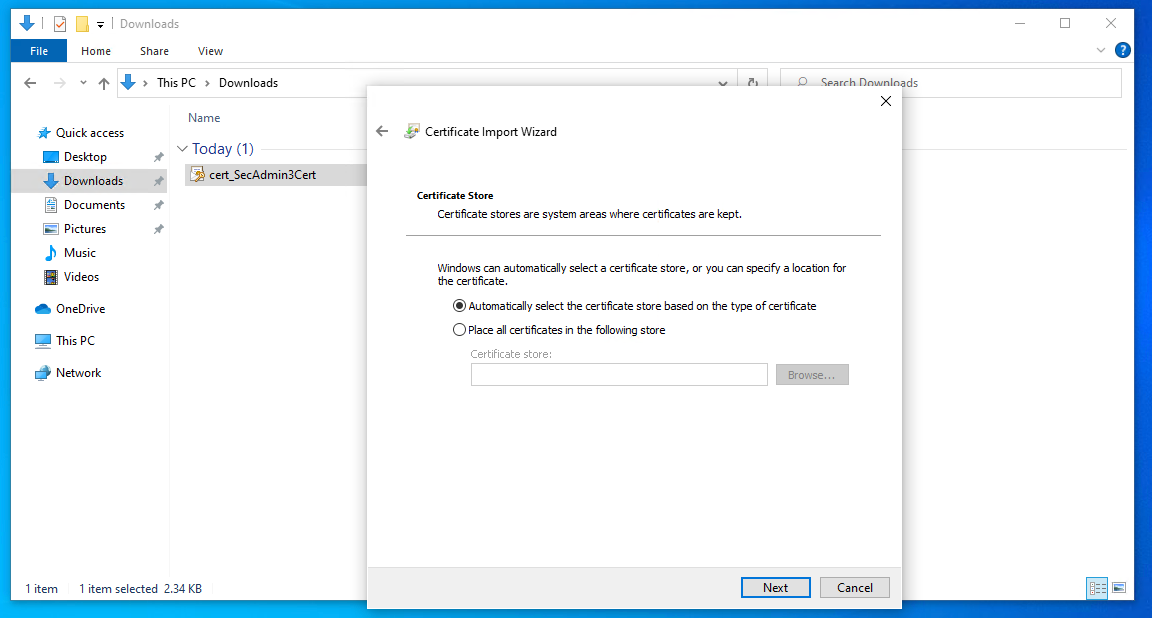
Allow the Wizard to "automatically select the certificate store based on the type of certificate.
And finally click the "Finish" button.
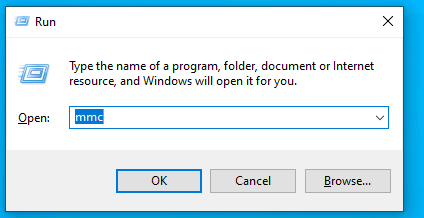
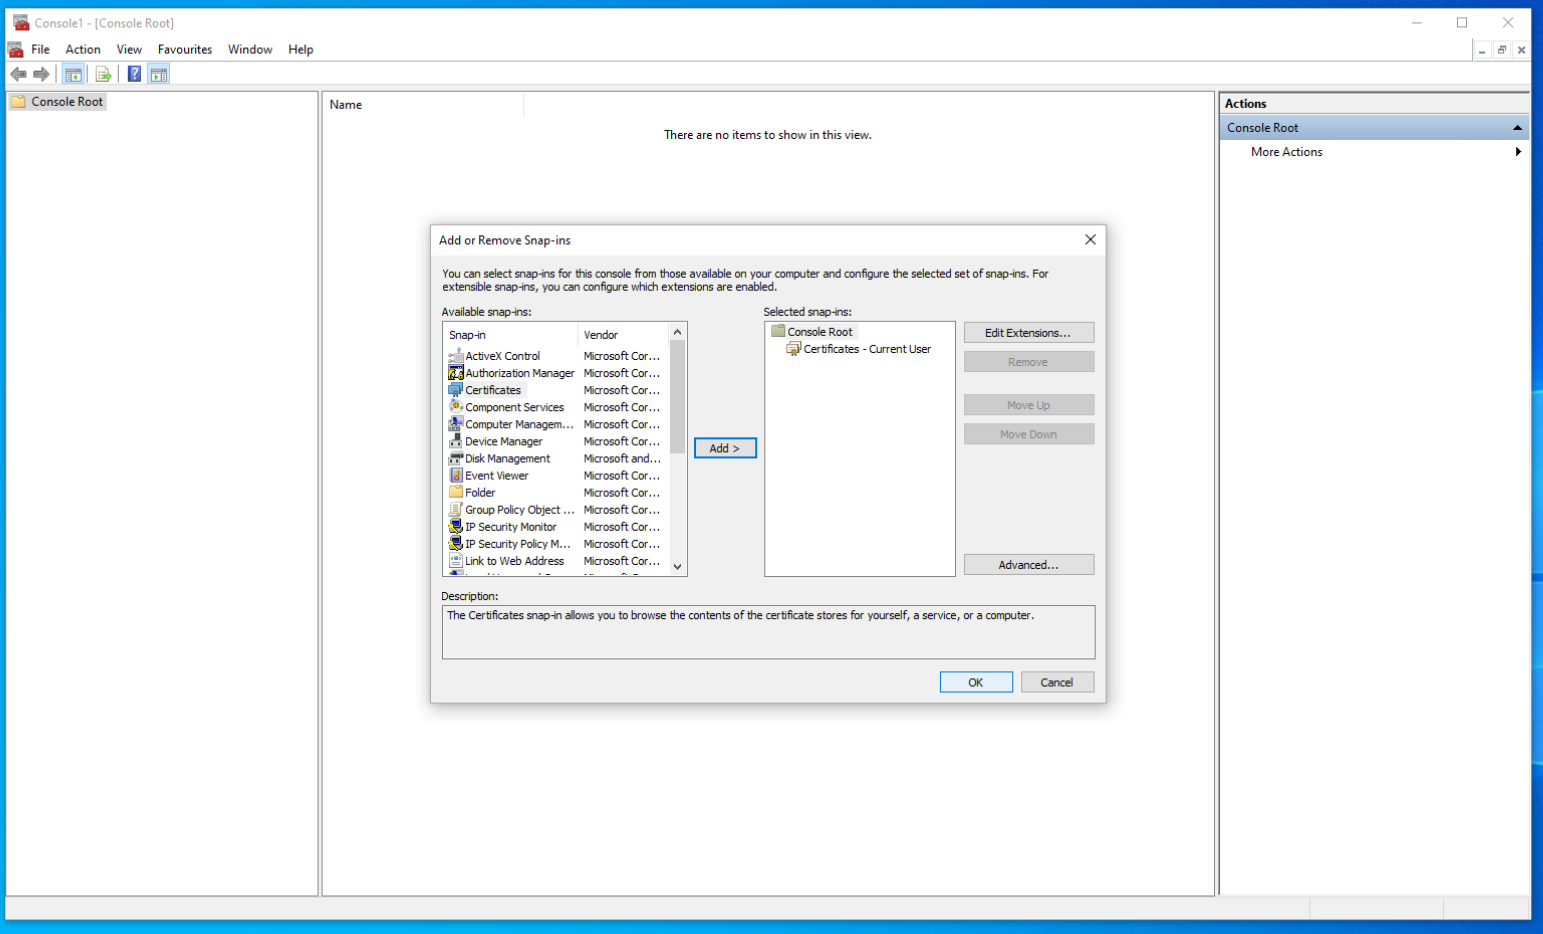
Now its time to verify that the client certificate is in place, so open up MMC from the run tool.
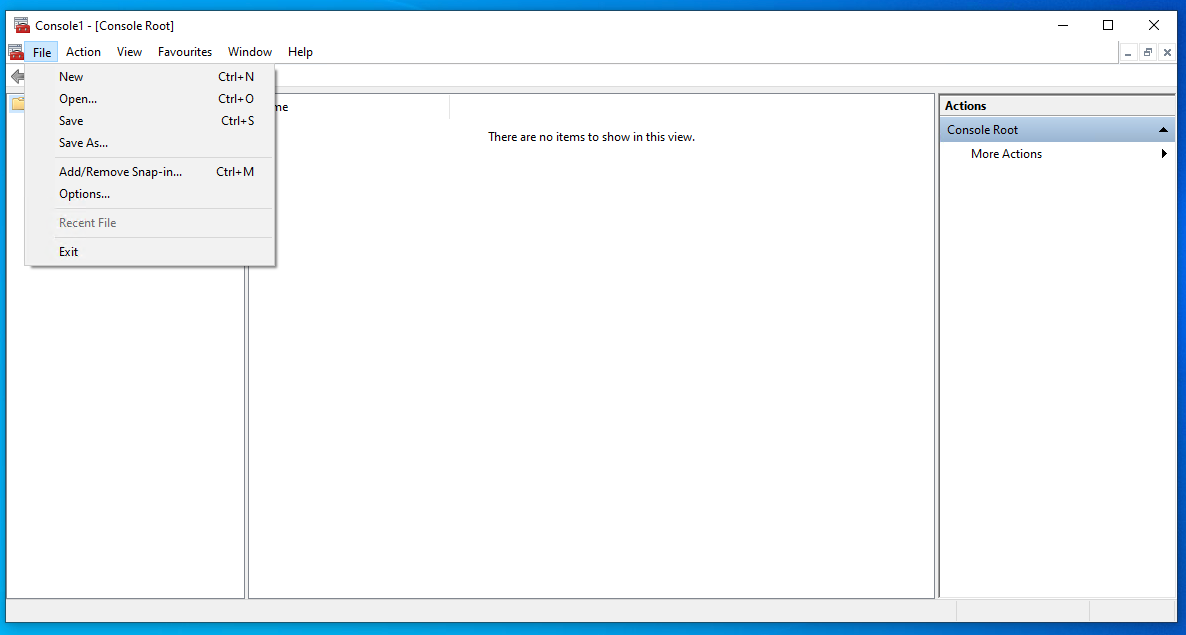
Go to File ->Add/Remove Snap-in..
Choose "Certificates" and move it to the white space on the right and click "OK"
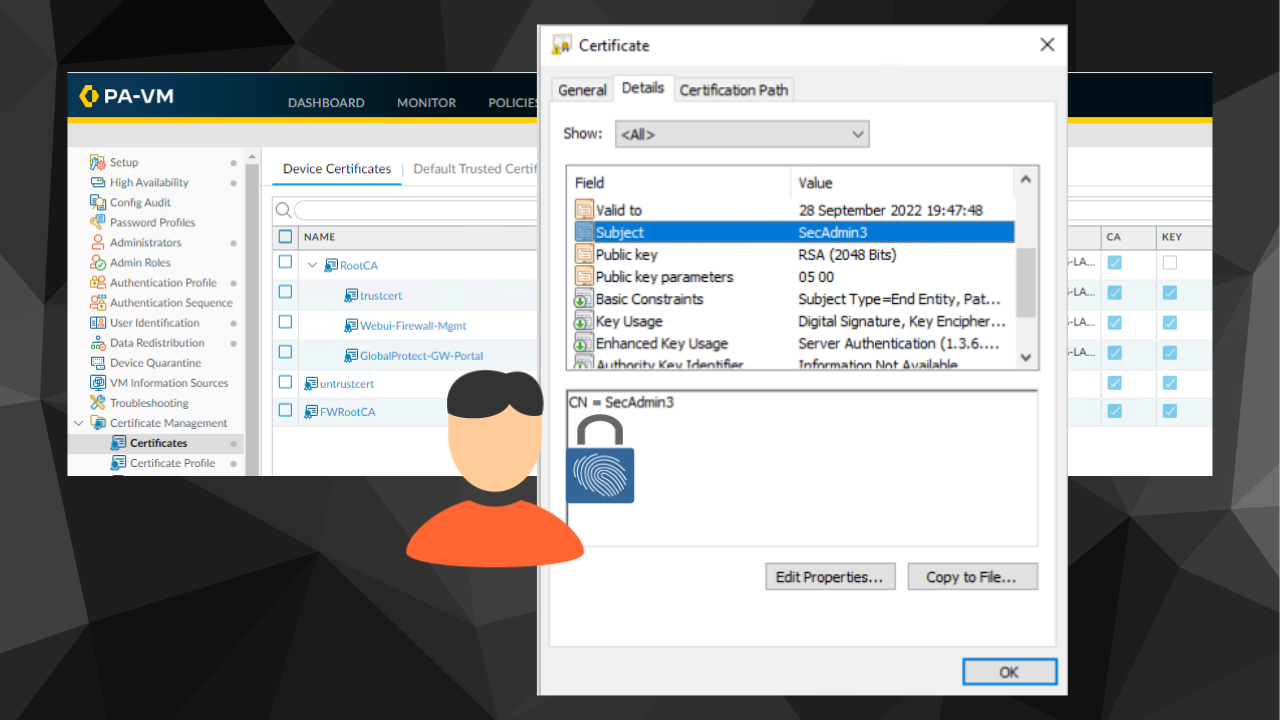
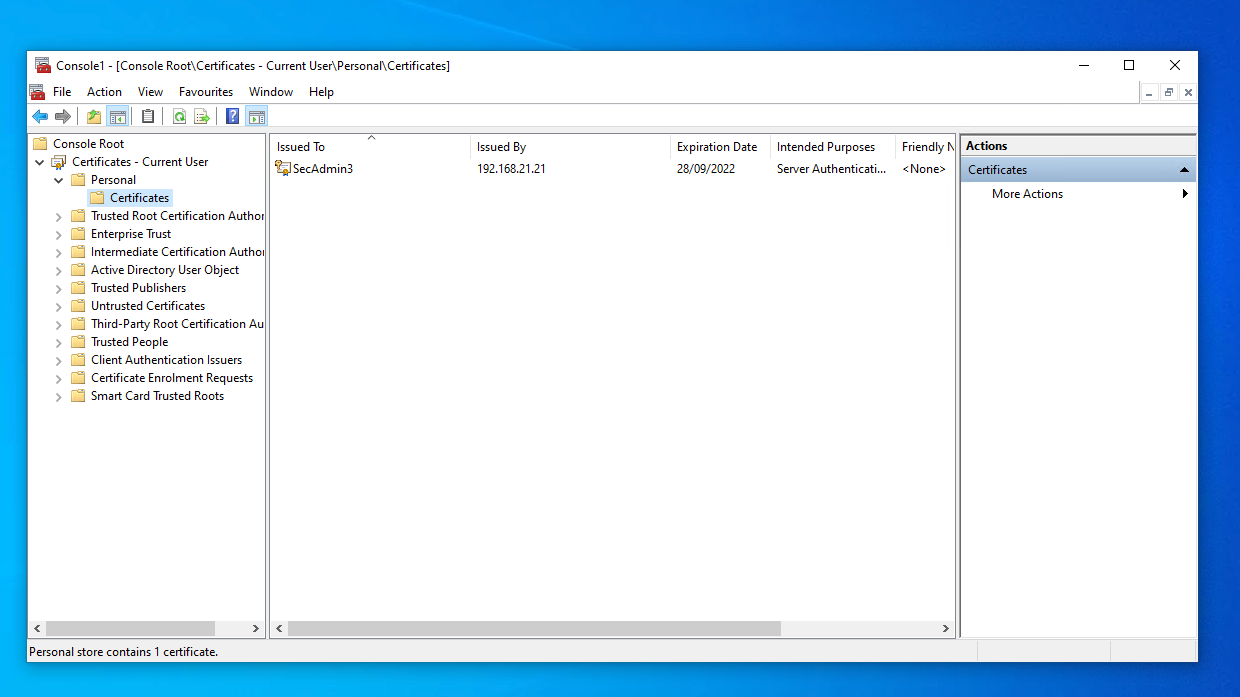
Now you need to expand the "Certificates - Current User" folder, and expand "Personal" and click on "Certificates" which will reveal the new client certificate.
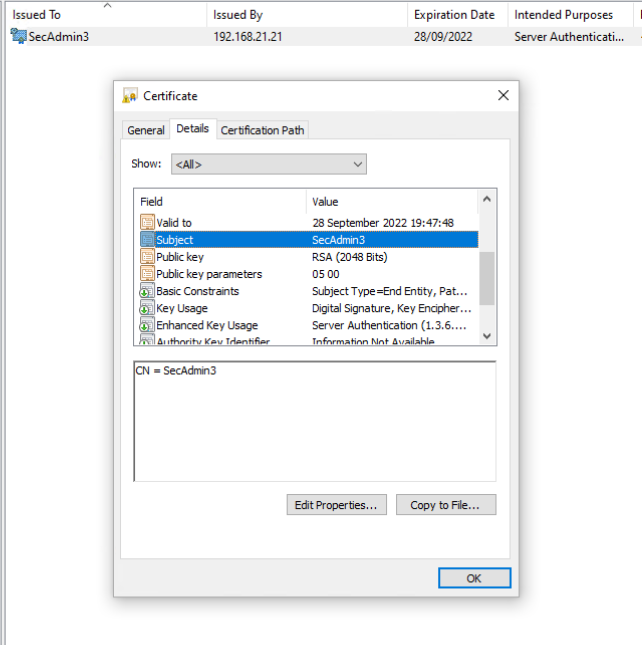
If we click on the certificate and click on the "Details" tab and look at the information in the "Subject" field, we can see the common name (CN) is the username SecAdmin3.
As an example use case, this client certifcate can be used to autenticate the user to a GlobalProtect Portal and Gateway. If you want to see this in action check out my video on my YouTube Channel.